Today was Lesson #3 and it was mostly focused on photo editing using the program
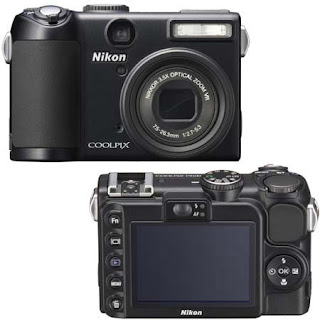
Adobe Photoshop. The main objective of the lesson is to understand the terms Apature and Shutter Speed and then take pictures that show our understanding. To help you further understand this I will tell you which kind of camera I have exactly
.It is a Nikon Coolpix P5100. It is digital and has a fixed lens. Because of the fixed lens it is harder for my camera to show the drastic difference between Macro Mode and Landscape mode when you are a certain distance from your subject. The ideal cameras for showcasing these features are the SLR (single lens reflex) cameras. Unfortunately there is approximatly a $500 difference in price at least. Thankfully to Adobe Photoshop I can edit the pictures to get the same great effect. Here are some pictures illustrating these camera settings.
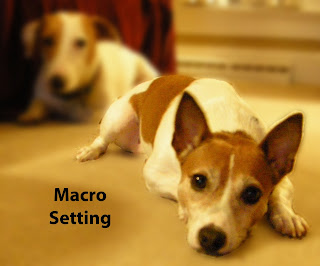
This setting is indicated on most cameras as the flower. The camera automatically zooms to the position at the closest distance at which the camera can focus. My camera can focus as close as 4 cm.

This setting is indicated on most cameras as a mountain. The camera focuses at infinity. Sometimes the objects in the foreground are not always in focus. Meaning, sometimes the dog in the front would be out of focus while the dog in the back would be in focus. It is a pretty neat setting! Because I was so close to both dogs the camera picked up both of them clearly.

I used Adobe Photoshop to edit this picture because I did not like the background, i.e. the register, and so I blurred out everything except the dogs which made them really stand out.
Harley is the dog in front and Ervin's dog Lucky is the one behind her. They are so well behaved!

No comments:
Post a Comment